Ok, I realise I'm flattering myself by drawing any parallels at all between the work of the wonderfully talented Lebanese design studio, Bokja, and my own limited forays into the world of soft furnishings, but I'm going to put it out there anyway.
I first came across Hoda Baroudi and Maria Hibri's work on fffffound! back in August, and was immediately smitten. Almost as immediate was the unfortunate realization that I'm unlikely ever to be able to afford one of their beautiful pieces in my home, so I set about trying to make my own, (loosely) inspired by their colourful, patchwork designs.
We have two chairs in our living room that looked like this (excuse my dirty floor and part of Mr H's "inflatable architecture" project hiding behind the cabinet):
They're both identical in form, though not in colour, and pretty comfortable.
I'd never made any kind of slipcover before, and thought these might be a fairly simple shape to start with. Well, yes and no. The back cushion is curved and I struggled a little to hug this curve with the covering, but in hindsight I realize that all I probably needed was some darts in the fabric. Maybe one day I'll get around to fixing that...
I bought a couple pieces of fabric specially for this project, but mostly used scraps that I had lying around. One of these was Michael Miller's French Journal (below), which I'd been saving for a copy-cat Anthropologie apron, so I was a little sad to use it up, but in the end I really liked how it worked with the rest of the patchwork. (See what I mean about the fabric not lying flush against the curvature of the cushion? Very annoying.)
One of the things I really liked about Bokja's pieces was their use of complimentary colours. I like things to clash a little bit :) So I did one chair in pink, lime green, and mustart, and one in coral, mustard and turquoise. I'm not going to pretend I have the expertise to post a tutorial here; I'll skip straight to the finished products:
Now we just need some cushions...
Showing posts with label furniture. Show all posts
Wednesday, 30 November 2011
Tuesday, 4 October 2011
Wardrobe Makeover
Well, I hadn't intended to start this blog with such a big project - I've never refinished a piece of furniture before so it was a bit of an experiment - but I had a couple of things on the go simultaneously and this was the one that got finished first. I wasn't very consistent about photographing the process, so that aspect's a bit choppy; please bear with it!
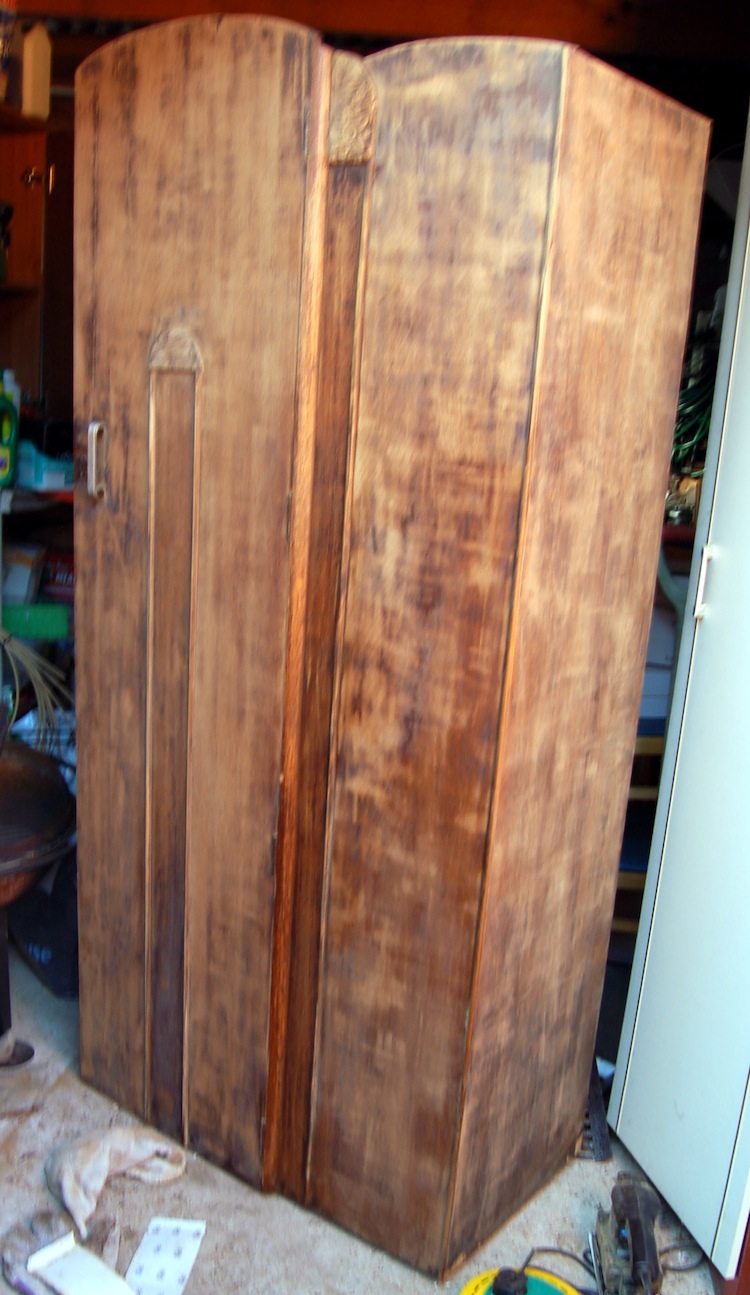
Mr H and I had accidentally broken a couple legs off my wardrobe when we were moving into our house just over a year ago, and since then it had been propped up somewhat precariously on a stack of books, so when I saw that someone had posted a "small wardrobe" on freecycle I snapped it up. I was a little less excited when I went to the poster's home to pick it up and realised it looked like this:
(Yes, I accidentally took the picture from the back instead of the front because I'm intelligent like that. The point is, it came in two separate pieces and looked pretty battered.) Its redeeming factors were that it had originally been bought in the 1930s, that the owners also threw a beautiful old dining chair into the bargain, and that it had these two carvings in the front. I'm a sucker for pairs or sets of things that don't exactly match, so I was sold on the carvings.
I kept it in two parts the whole time I was working on it, largely because it fit better in the garage like that, then assembled it upstairs once it was completely done. I started by stripping the original finish using Colron Furniture Stripper. As I said, I'd never done anything like this before and didn't realise I'd need about 2 litres of the stuff (Girls, it's not blusher. Less is not more). Between the stripper, a bunch of wire wool, and some elbow grease, we managed to get most of the varnish off. Then I ran my orbital sander over the whole thing to smooth it out. By this point, it looked like this (as you can see, I probably didn't strip it quite as well as I could have; it's still pretty patchy):
Still kind of ugly, no? This process probably took about 4 hours, not including multiple runs to the hardware store to pick up more furniture stripper and wire wool. The point of this project was to keep things low-cost, so I intended to paint it using normal wall paint that I already had lying around. To help it adhere, I did buy some primer, and primed the surface with that before painting. I put the primer on fairly roughly, like this:
Now, you may have noticed in the first picture that there's a mirror on the inside of the door. I suspect this had been on there for a good few decades, as it was in pretty bad shape. I got rid of that, then realised it had been used to cover up how incredibly uneven the inside of the door was. I don't know enough about wardrobe construction to know the reason for this, but it looked as though there were a couple layers of veneer on the door, and various layers had peeled away in big swathes so that there was about a 2mm difference between the thickest and deepest points on the surface of the door. (Sorry, a photo would have described that more clearly, but I didn't have the foresight.) In any case, I filled the door in with wood filler and sanded it down using a fine grain so it would be really smooth.
Once all the primer and wood filler was completely dry, I painted the outside with a tin of light cream gloss that I had leftover from some earlier house-painting project. I painted the inside (without priming it) with matt wall paint in a similar colour.
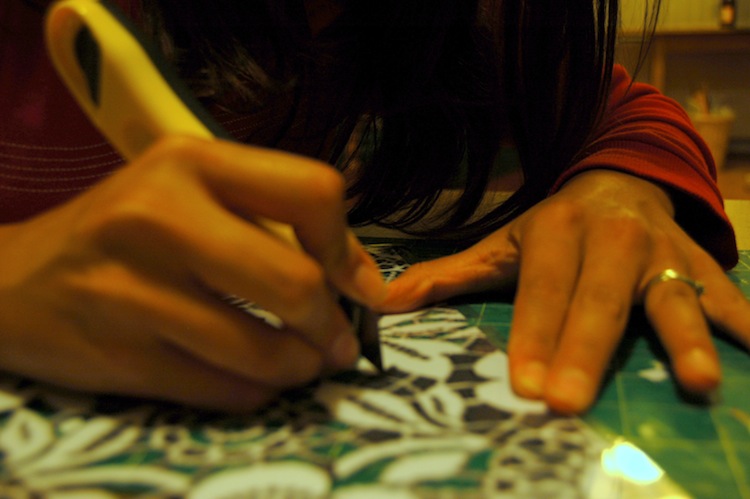
Now, earlier that week, I'd been smitten by a stencil I'd seen online called Skylar's Lace. Unfortunately, the Royal Design Studio's prices didn't really feature in my budget for this wardrobe, so I set about making my own. I ran a Google image search for Skylar's Lace, and edited it in photoshop to make the edges of the portion I'd found match up, and to simplify the design a little. I printed this out on A3 paper and laminated it, then used a craft knife to cut it out. This took maybe 2 hours total.
I used repositional adhesive spray and a mini paint roller to stencil this onto the inside of the wardrobe using Dulux paint in Indian Ivy, which is kind of a luminous, lime green. I know nobody sees the inside of your wardrobe except for you, but that's kind of what I like about it. Oh wait, I did take a picture of the whole stencil, but only remembered to do this after I'd used it a couple times so that's why it's a little green. As you can see, I simplified it again when cutting it out and skipped some of the tiny, detailed parts.
My stencilling is far from perfect...
By this point I was definitely starting to be happier about the way the wardrobe was looking, but it still looked kind of "cleaner" than what I was going for. I did a little research online into different distressing techniques, then ran my sander over the whole outside again to "rough up" the paint a little. In some places the sander went right through to expose the wood underneath, and in others it just made the surface of the paint less glossy and smooth. I mixed up a light brown wash using heavily diluted acrylic paint, soaked a cloth in this, and ran it over the surface of the wardrobe. The newly rough surface provided something for the colour to "grab onto" in places, to dirty the whole thing up a little.
This wardrobe is significantly smaller than my previous one, so it then had to sit in the garage for about 3 weeks while I reluctantly purged about a third of my clothes. Mr. H kindly gave up almost a whole Saturday to help me dismantle the old wardrobe, lug this one painfully up the stairs (suddenly Ikea's love affair with MDF makes a whole lot more sense to me. Real wood is heavy!), and assemble it in our room.
Aaand....
This was the final result! It's not perfect, but for a first furniture project, I was pretty happy with it :)
Mr H and I had accidentally broken a couple legs off my wardrobe when we were moving into our house just over a year ago, and since then it had been propped up somewhat precariously on a stack of books, so when I saw that someone had posted a "small wardrobe" on freecycle I snapped it up. I was a little less excited when I went to the poster's home to pick it up and realised it looked like this:
(Yes, I accidentally took the picture from the back instead of the front because I'm intelligent like that. The point is, it came in two separate pieces and looked pretty battered.) Its redeeming factors were that it had originally been bought in the 1930s, that the owners also threw a beautiful old dining chair into the bargain, and that it had these two carvings in the front. I'm a sucker for pairs or sets of things that don't exactly match, so I was sold on the carvings.
I kept it in two parts the whole time I was working on it, largely because it fit better in the garage like that, then assembled it upstairs once it was completely done. I started by stripping the original finish using Colron Furniture Stripper. As I said, I'd never done anything like this before and didn't realise I'd need about 2 litres of the stuff (Girls, it's not blusher. Less is not more). Between the stripper, a bunch of wire wool, and some elbow grease, we managed to get most of the varnish off. Then I ran my orbital sander over the whole thing to smooth it out. By this point, it looked like this (as you can see, I probably didn't strip it quite as well as I could have; it's still pretty patchy):
Still kind of ugly, no? This process probably took about 4 hours, not including multiple runs to the hardware store to pick up more furniture stripper and wire wool. The point of this project was to keep things low-cost, so I intended to paint it using normal wall paint that I already had lying around. To help it adhere, I did buy some primer, and primed the surface with that before painting. I put the primer on fairly roughly, like this:
Now, you may have noticed in the first picture that there's a mirror on the inside of the door. I suspect this had been on there for a good few decades, as it was in pretty bad shape. I got rid of that, then realised it had been used to cover up how incredibly uneven the inside of the door was. I don't know enough about wardrobe construction to know the reason for this, but it looked as though there were a couple layers of veneer on the door, and various layers had peeled away in big swathes so that there was about a 2mm difference between the thickest and deepest points on the surface of the door. (Sorry, a photo would have described that more clearly, but I didn't have the foresight.) In any case, I filled the door in with wood filler and sanded it down using a fine grain so it would be really smooth.
Once all the primer and wood filler was completely dry, I painted the outside with a tin of light cream gloss that I had leftover from some earlier house-painting project. I painted the inside (without priming it) with matt wall paint in a similar colour.
Now, earlier that week, I'd been smitten by a stencil I'd seen online called Skylar's Lace. Unfortunately, the Royal Design Studio's prices didn't really feature in my budget for this wardrobe, so I set about making my own. I ran a Google image search for Skylar's Lace, and edited it in photoshop to make the edges of the portion I'd found match up, and to simplify the design a little. I printed this out on A3 paper and laminated it, then used a craft knife to cut it out. This took maybe 2 hours total.
I used repositional adhesive spray and a mini paint roller to stencil this onto the inside of the wardrobe using Dulux paint in Indian Ivy, which is kind of a luminous, lime green. I know nobody sees the inside of your wardrobe except for you, but that's kind of what I like about it. Oh wait, I did take a picture of the whole stencil, but only remembered to do this after I'd used it a couple times so that's why it's a little green. As you can see, I simplified it again when cutting it out and skipped some of the tiny, detailed parts.
My stencilling is far from perfect...
By this point I was definitely starting to be happier about the way the wardrobe was looking, but it still looked kind of "cleaner" than what I was going for. I did a little research online into different distressing techniques, then ran my sander over the whole outside again to "rough up" the paint a little. In some places the sander went right through to expose the wood underneath, and in others it just made the surface of the paint less glossy and smooth. I mixed up a light brown wash using heavily diluted acrylic paint, soaked a cloth in this, and ran it over the surface of the wardrobe. The newly rough surface provided something for the colour to "grab onto" in places, to dirty the whole thing up a little.
This wardrobe is significantly smaller than my previous one, so it then had to sit in the garage for about 3 weeks while I reluctantly purged about a third of my clothes. Mr. H kindly gave up almost a whole Saturday to help me dismantle the old wardrobe, lug this one painfully up the stairs (suddenly Ikea's love affair with MDF makes a whole lot more sense to me. Real wood is heavy!), and assemble it in our room.
Aaand....
This was the final result! It's not perfect, but for a first furniture project, I was pretty happy with it :)
Subscribe to:
Posts (Atom)